Setting up networking is quite a difficult task in VirtualBox compared to other operations. Configuring networking can be done in a few clicks but understanding what are different network modes available and you have to choose a model that satisfies your needs.
[ You might also like: Getting Started with VirtualBox in Linux ]
In VirtualBox, each virtual machine can have up to 8 virtual network adapters. From VirtualBox GUI manager you can configure four network adapters and using VboxManage you can configure eight network adapters in total. VirtualBox has a built-in DHCP server that assigns an IP address to Guest VM based upon the mode you choose.
Virtualbox Networking Options
There are five different network modes.
- Network Address Translation (NAT)
- NAT Network
- Bridged Networking
- Internal Networking
- Host-only Networking
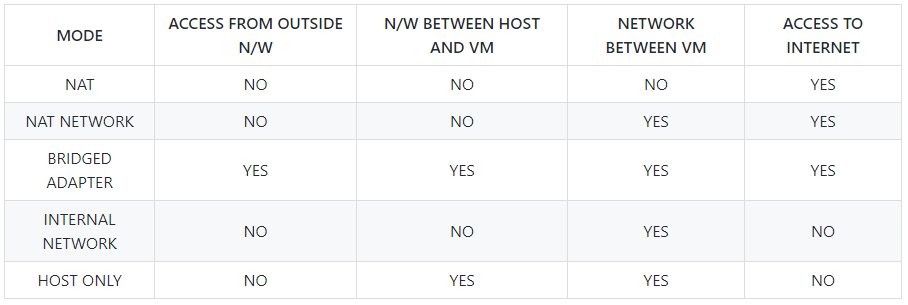
The below table helps you understand how different networking options works and which one is suitable for you.
Network Address Translation (NAT)
This is the default mode when you create a Guest VM. In NAT mode VM is well protected and VM uses host machine IP as a proxy to connect to the external world (Internet). Virtualbox runs “NAT ENGINE” which receives the network packets from the guest VM and sends the packet to the host adapter to connect to the Internet.
You will be assigned with an IP (10.0.2.15) by the VirtualBox DHCP server which will not be accessible outside the VM.

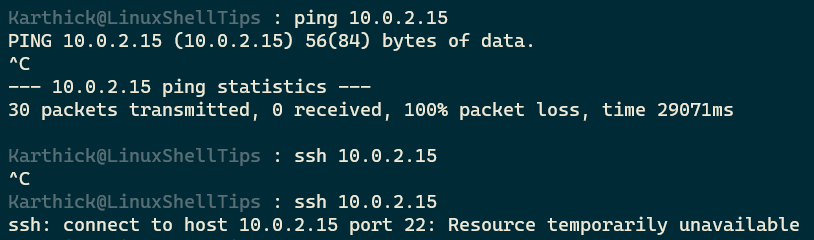
Now if you try to ping or SSH to the guest machine running in NAT mode from your local machine it will not be reachable.
$ ping 10.0.2.15
$ ssh 10.0.2.15
You can use the port forwarding technique to connect to the guest VM running in NAT mode. Go to Settings → Network → Port Forwarding → Add Icon.
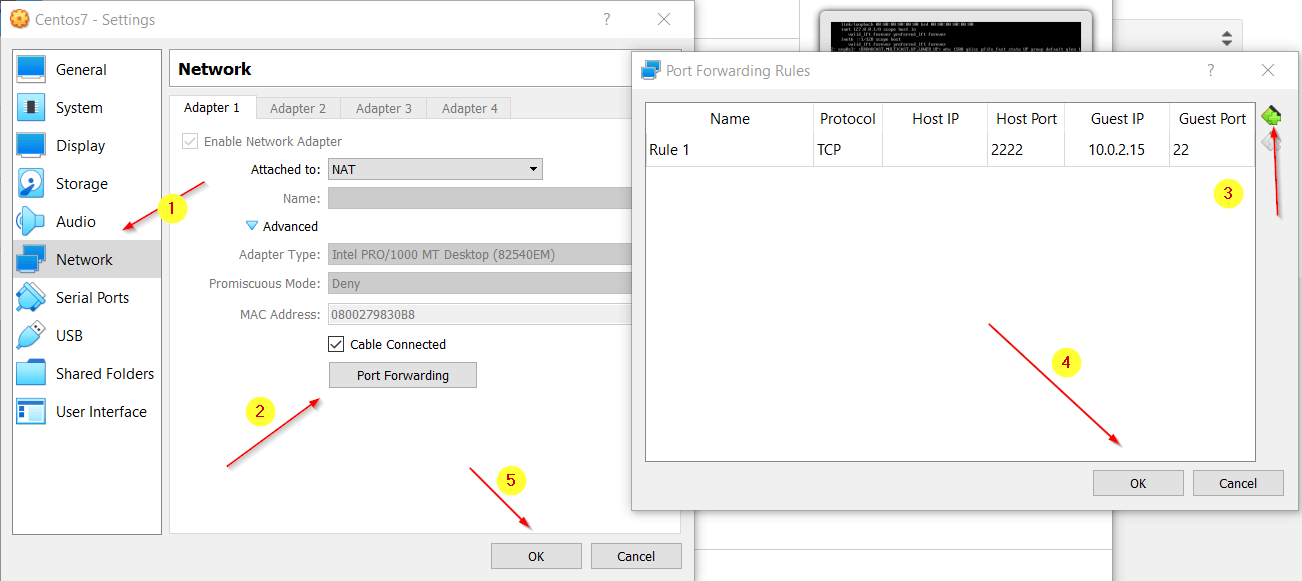
Meaning of each Network parameter.
- NAME – Any name for the rule.
- PROTOCOL – TCP/UDP
- HOST IP – The machine from which you try to connect to Guest VM. Leaving it blank means it will take it as any machine.
- HOST PORT – Port through which you will connect to guest VM from the host machine.
- GUESTIP – Your Guest machine IP address.
- GUEST PORT – Which port to be used to connect to the Guest machine. In my case, I am doing SSH so my port will be 22.
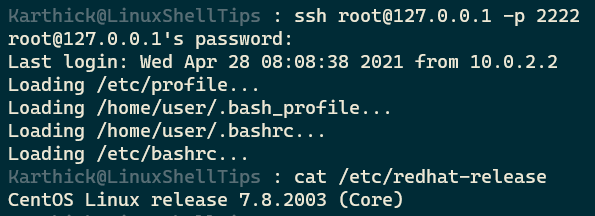
Now if I try to connect to my guest VM from my host machine it worked fine.
$ ssh [email protected] -p 2222
NAT Network
NAT Network is similar to NAT mode but the difference is when you create your VM in NAT it cannot communicate with other VM running over NAT. To make your VM running in NAT talk internally then you have to explicitly create a NAT network.
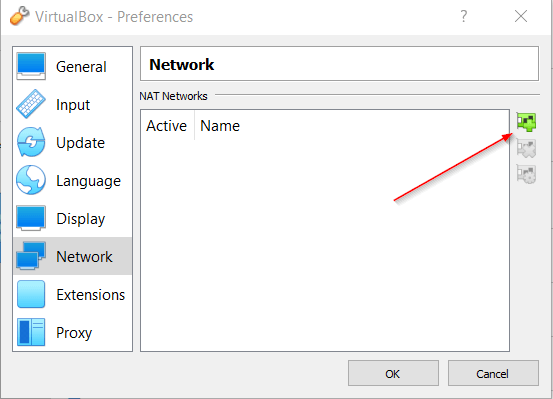
Go to File → Preferences → Network → Click Add Icon as shown below.
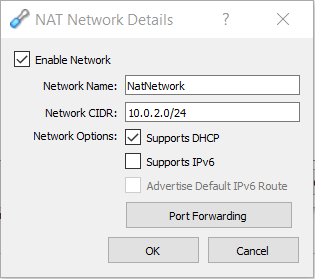
Right-click the network and press edit settings. Now you can set Network CIDR and port forwarding. When you create a VM using this NAT network then each machine will get an IP address allocated in the range 10.0.2.X.
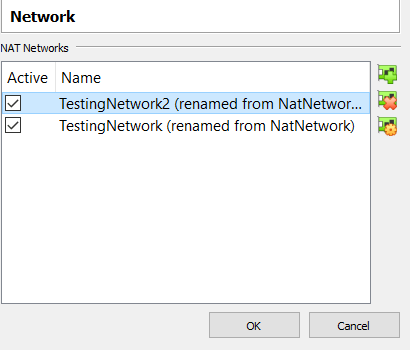
I have created two networks as shown in the below image.
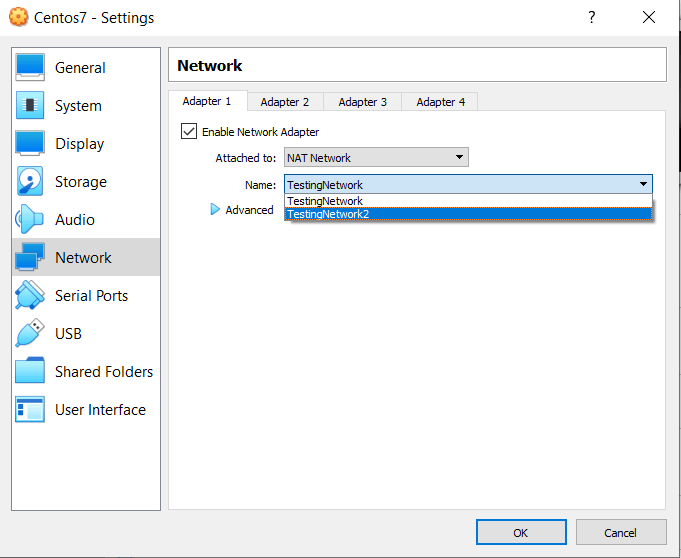
Now you can choose the NAT network you created. When you start the VM an IP address will be automatically assigned to each VM and your VM can talk to each other in NAT mode.
VirtualBox Bridged Network
In bridged network mode, your VM will be treated as if it was part of your home network. Your physical router will act as the gateway. Any devices within the same network can talk to each other and VM can also talk over the internet too. Your guest machine will get the IP address directly from your router DHCP.
To change the network go to settings → Network → Bridged Adapter.
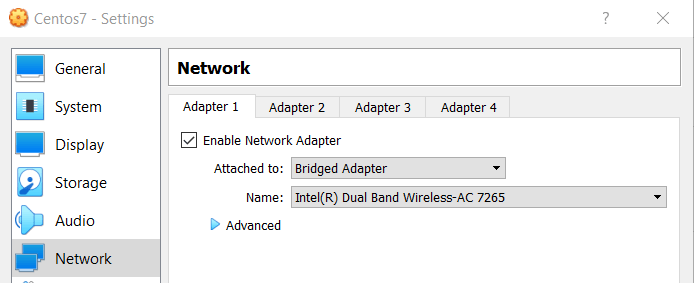
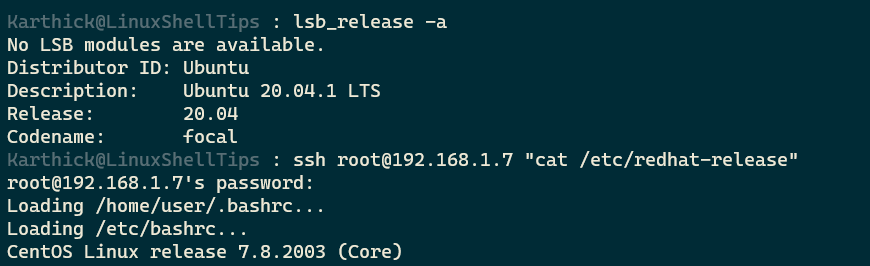
Now, my guest VM is assigned with 192.168.1.7 which is now part of my home network (192.168.1.0).
$ ip a s

Try connecting with your guest VM from the host machine and it will work fine.
$ ssh username@IP "command"
Internal Network
In this mode, your Guest machines can communicate with multiple guest machines which are running in the same Internal network. In this mode, your guest machine will not be able to connect to the Internet or you cannot connect to the guest machine from your host machine.
In Internal network mode, your VM will not be assigned with any IP address initially. You have to run the following command to enable the DHCP for the internal network so when you boot the VM automatically IP address will be assigned to each VM running on the internal network.
$ vboxmanage dhcpserver add --netname intnet --ip 10.15.2.1 --netmask 255.255.0.0 --lowerip 10.15.2.1 --upperip 10.15.2.255 --enable
The above command will start assigning IP addresses ranging from 10.15.2.1 to 10.15.2.255 as you add VM to your Internal network.
Go to VM settings → Network → select Internal Network.
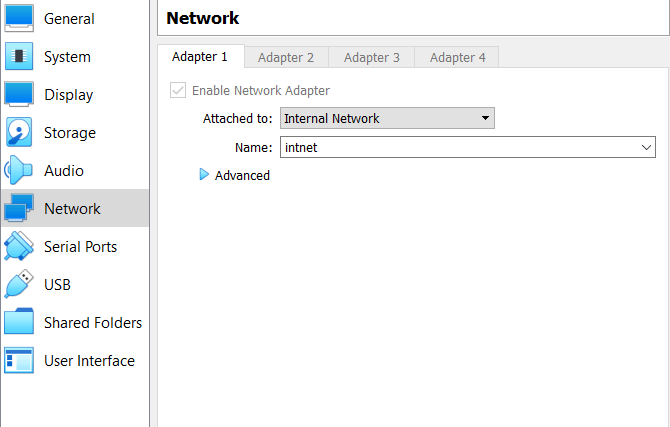

Now if you look at the above image, my centos7 guest machine has got IP address assigned 10.15.2.2 which I have set it up when running the DHCP command. Now if you spin up one more machine in the Internal network, your VM will be allocated with 10.15.2.X IP.
Host-Only Network
In a Host-only network, instead of using a host machine adapter like bridged mode, it will create virtual adapters for connections between the host and guest machines. This virtual adapter will also act as a DHCP server to assign an IP address to each VM you create under a host-only network.
Go to VirtualBox Manager → File → Host Network Manager or press CTRL + H. In the host network manager, you can create a new host-only network by pressing the create button. Make sure to select the Enable DHCP server option.
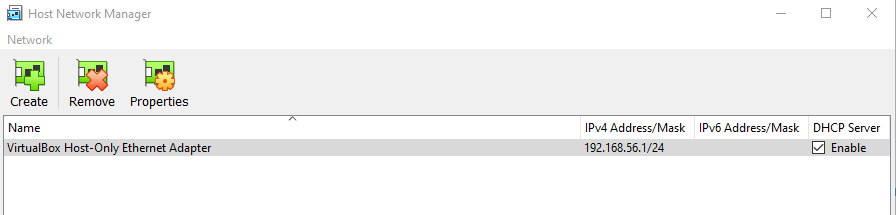
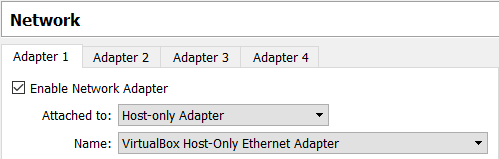
Open the VM network settings and set the network adapter to Host-Only adapter and choose the network that you created.
Now boot the VM and check the IP address assigned. My host-only adapter is created with an IP range (192.168.56.*) and here my machine is assigned with 192.168.56.101.

In this mode, you will not be able to connect to and from the Internet. You can communicate with other hosts running in this mode and from your host machine you can connect with the Guest machine.

Now you might have a fair understanding of different networking options in VirtualBox. Depending upon the use case you can choose the networking mode. In the next article, we will see how to create VM snapshots in VirtualBox.